In this particular tutorial I am going to share with you how to start using the NextGEN Gallery WordPress plugin. NextGEN Gallery is probably the best gallery plugins for WordPress. After implementing it for some of my clients, I created this free WordPress tutorial since I feel there isn’t much information about how to start with this plugin.
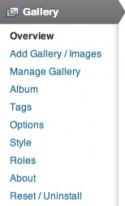
After installing and activating the NextGEN plugin, you’ll see an additional menu at the left of the dashboard:

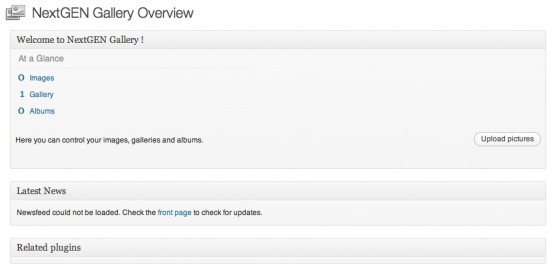
Click on “Gallery” > “Overview” in the left menu to get an overview:

In this overview screen above you can view how many Images you have uploaded, and how many Galleries and Albums you have created.
Adding a new gallery in NextGEN
Before you can upload images make sure to create a gallery first
To add a new gallery go to “Gallery” > “Add Gallery / Images” in the left menu. The following screen will appear:

If you haven’t created a gallery before, then you’re in the right tab (“Add new gallery“). If you allready have created other galleries, then you have to select the “Add new gallery“-tab.
Fill out the name of your new gallery and click on the “Add gallery” button.
Uploading images into NextGEN gallery
There are two main approaches to upload images to a gallery. You can upload images from a folder on our PC alternatively you can upload a zip-file with images. In this tutorial I will show you the first option.
Uploading images from your PC (easiest approach)
– Go to “Gallery” > “Add Gallery / Images”
– Select the “Upload images” tab
– Click the “Browse” button
– Select the image(s) on your computer and click the “Open” button
– Select “Scale images to max width 800px or max height 600px” if you want to scale down the max size of the images*
– Choose a gallery and click the “Upload images” button
* You can change the max scale size in the screen of the “Image Settings” (select “Gallery” > “Options” in the left menu, then click the “Images” tab)
Displaying an image gallery into a page / post:
After you created a gallery and uploaded some images into that gallery, it’s time to display the gallery into a page or a post:
– Open an existing page / post, or create a new page / post
– Click on the place where you want to place the gallery
– Click the “Add NextGEN Gallery” button:

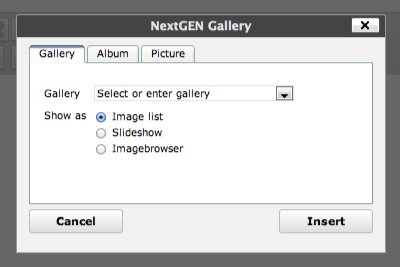
In the popup screen that appears you select “Gallery” tab, choose a gallery and select how you want to show the gallery (Image list, Slideshow or Imagebrowser):

Click the “Insert” button
And you’re done
Conclusion
I hope this tutorial made it clear how to create a new image gallery and how to display it on your page or post. This makes NextGEN Gallery an extremely flexible WordPress plugin which can be used by beginners AND advanced users.
